


How to Sanitize Nail Tools Safely at Home
A fresh manicure should feel like self-care, not a question mark. Knowing how to sanitize nail tools gives your at-home nail routine a more polished, salon-minded standard, especially when tools touch the cuticle area or are shared with anyone else. The goal is simple: remove visible debris, disinfect reusable implements correctly, and know which items should never be reused.
Clean, Sanitize, Disinfect: What Is the Difference?
These words are often used interchangeably, but they describe different steps. Cleaning removes dust, product residue, skin, and oils from a tool. Sanitizing reduces the number of germs to a safer level. Disinfecting uses a product designed to kill many disease-causing germs on hard, nonporous surfaces.
For nail tools that may come into contact with skin or cuticles, cleaning alone is not enough. A proper routine starts with washing away debris and follows with a disinfectant that is appropriate for salon tools and used according to its label. Sterilization is a higher-level process generally performed with specialized equipment. It is not the same as wiping a tool with alcohol.
That distinction matters because a tool can look perfectly clean and still need to be disinfected. Premium results are about the details you can see - and the hygiene standards you cannot.
Which Nail Tools Can Be Sanitized?
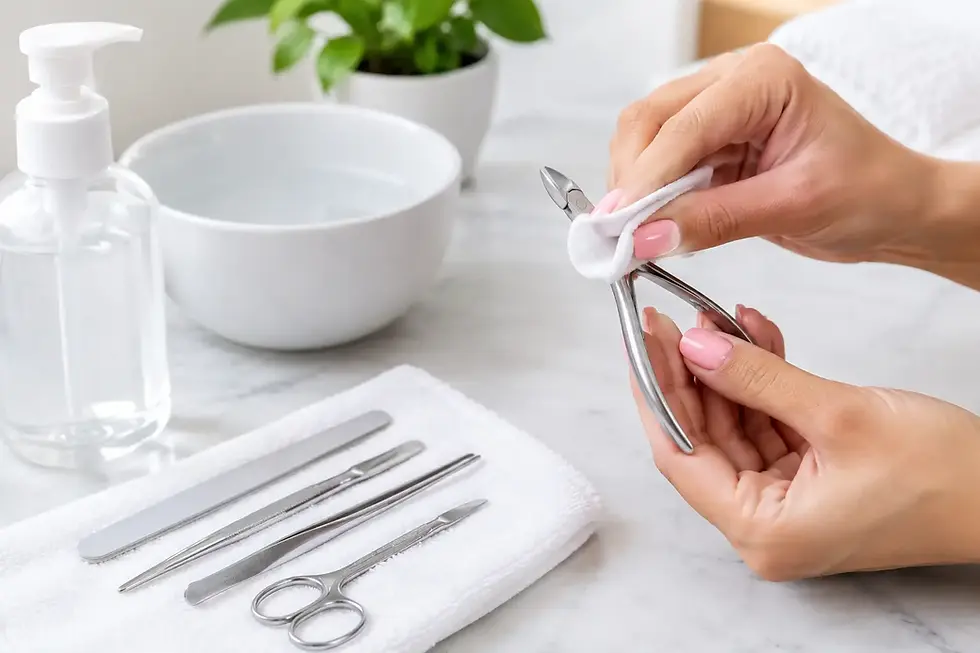
Metal tools are the easiest to maintain because they are nonporous and made for repeated use. Stainless-steel clippers, cuticle pushers, nippers, scissors, metal nail files, and many e-file bits can usually be cleaned and disinfected, provided the manufacturer does not say otherwise.
Porous items are different. Traditional nail files, buffers, wooden orangewood sticks, cotton, toe separators, and pumice stones should be single-use. Once they have been used, discard them rather than trying to sanitize them. Their textured or absorbent surfaces can hold product and debris in places a disinfectant cannot reliably reach.
Some tools need extra caution. Brushes can collect dust deep in their bristles, and certain e-file bits or attachments may have material-specific care instructions. When in doubt, follow the maker's directions. A beautiful, precise result is never worth damaging a favorite tool or taking shortcuts with hygiene.
What You Need Before You Start
Set up your station before you begin so clean tools do not get mixed with used ones. You will need:
Warm water and liquid soap or detergent
A clean brush reserved for scrubbing tools
An EPA-registered disinfectant suitable for hard, nonporous implements
A clean container with a lid, if your disinfectant requires immersion
Disposable towels or clean, lint-free towels
A separate, covered container or pouch for fully disinfected tools
Read the disinfectant label from start to finish. The dilution ratio, contact time, and rinsing instructions vary by product. “Contact time” means the surface must stay visibly wet for the full number of minutes listed on the label. A quick spray-and-wipe may smell clean, but it may not disinfect as intended.
How to Sanitize Nail Tools Step by Step
1. Separate reusable tools from disposables
As soon as your manicure or pedicure is finished, toss single-use files, buffers, wooden sticks, and other disposable items. Place reusable metal tools in a designated “used” area. Do not put them back in a clean drawer just because they look free of polish.
If a tool has blood, body fluid, or visible skin residue, handle it carefully and keep it separate from clean supplies. Skip DIY use if you have an open cut, active skin infection, or unexplained irritation around the nail. That is a moment to pause the service and seek appropriate professional or medical guidance.
2. Wash away all visible residue
Wash reusable tools with warm water and soap or detergent. Use a small brush to clean hinges, grooves, textured surfaces, and the inside edges of clippers and nippers. This step is nonnegotiable: disinfectant works best on tools that are already clean.
Rinse thoroughly. Check each tool under good light. If you can still see dust, dried product, or residue, wash it again. A clean station has no room for “good enough.”
3. Dry or prepare tools as your product directs
Some disinfectants are applied to dry tools, while others are made for immersion after cleaning. Follow the product label exactly rather than combining advice from different products. Mixing chemical cleaners can be unsafe, and changing the dilution can make a disinfectant less effective or harsh on your tools.
For immersion products, use a clean, covered container large enough for tools to be fully submerged. Open hinged tools so the solution can reach every surface. Never add dirty tools to a container of disinfectant that has already been used or looks cloudy.
4. Disinfect for the full contact time
Keep the tools wet or submerged for the complete contact time on the label. Set a timer. This is one of the simplest ways to make a home routine more reliable, because guessing often means cutting the process short.
Avoid assuming that rubbing alcohol is a full replacement for a properly labeled disinfectant. Alcohol can be useful for certain cleaning tasks, but it evaporates quickly and may not provide the required contact time or coverage for every situation. Likewise, UV boxes are not a substitute for washing and using an appropriate disinfectant.
5. Rinse, dry, and store correctly
After disinfection, rinse only if the label instructs you to do so. Dry tools completely with a clean, lint-free towel or allow them to air-dry on a sanitized surface. Moisture trapped in hinges or storage containers can lead to rust and make tools less pleasant to use.
Once dry, place tools in a clean, closed container, pouch, or drawer away from dust, bathroom splashes, and used products. Keep clean and used tools separate. If you are unsure whether a tool has been disinfected, treat it as used and start the process again.
How Often Should You Sanitize Nail Tools?
Reusable tools should be cleaned and disinfected after every use, even if they were only used on you. It is especially essential before using tools on another person. Sharing a buffer or file may seem harmless between friends, but porous tools should not be shared at all.
Your storage area also deserves regular attention. Wipe down your manicure table, lamp controls, polish bottle exteriors, and drawer handles after a session. Wash your hands before and after nail care, and clean under your nails rather than relying on hand sanitizer alone.
If you do your nails often, create a small rotation of metal implements. That gives each set time to be properly cleaned, disinfected, dried, and stored without rushing the process before your next polish change.
A Note on E-File Bits and Advanced Nail Care
E-file manicures can create exceptionally clean, detailed cuticle work when performed with expert technique. They also require thoughtful tool care. Metal and diamond bits are often reusable, but dust must be brushed away before disinfection, and bits should be completely dry before storage. Ceramic, sanding-band, or specialty attachments may have different care requirements.
Sanding bands are typically single-use. Never reuse them, even if they appear intact. For bits with narrow grooves or intricate shapes, use a brush that can reach the surface without damaging it. Do not leave tools soaking longer than directed, since extended exposure can affect finishes, adhesives, or moving parts.
At a professional salon, hygiene procedures also follow local regulations, product instructions, and service-specific protocols. A clean, welcoming environment is part of the experience, but it is also the foundation for confident nail care.
When to Replace a Nail Tool
Disinfection cannot repair a tool that is worn out. Replace nippers that pull or tear skin, clippers with dull blades, rusty implements, cracked brushes, and any tool with damage that cannot be cleaned thoroughly. A smooth, sharp tool gives you better control and helps protect the nail and surrounding skin.
If you love the relaxation of a professionally finished manicure but want to keep your home kit in great shape between appointments, bring the same intention to both: clean tools, fresh disposables, and no rushed shortcuts. At Touchpoint Nails + Spa, that attention to detail is part of creating the calm, beautiful results every self-care moment deserves.
Comments